Thursday, July 30, 2009

M4A1 mortar carrier part 3

Bringing out the details

I assembled the markings from various Archer dry transfer sets to show a 3rd Armored Division vehicle, 36th Armored Infantry division, 2nd Head Quarters vehicle 41. I can't attest to the absolute accuracy of these set up but it was about the best I could come up with and will hardly be visible due to the weathering.

I applied one final misting from the airbrush to tone down the fresh white color of the markings and went over this with a rough wash of oil paint. I followed this with a more precise pin wash to the raised details and panels lines.

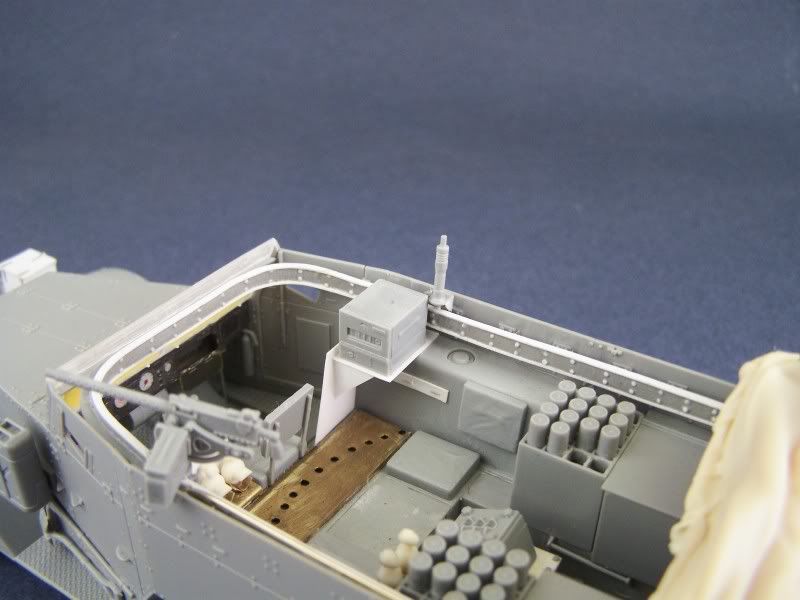
After painting the tracks, road wheels and front tires in Floquil's 'Grimy Black' I added a bit more gray to it and painted the machine gun. The next step was to add a bit of brown to that mix to paint the fiber tubes holding the mortar rounds. For a bit of bare metal shine on the drive and idler sprocket, I used an artists graphite pencil.

A mix of some olive drab and khaki went on the tarps and bedrolls, these will get more various shades applied to them later but this served as a fairly decent base. I lightened the mixed and painted the straps holding all the stowage and then put a little gray/green mix on the buckles.

The last step was some random dabs of paint, some done with a torn piece of a 'Scotch Brite' pad and some with a fine brush. This was applied in the general 'chipping' technique application, although I don't necessarily mean to portray paint chipping as much as general scuffs and smudges.


Wednesday, July 29, 2009

M4A1 mortar carrier part 2

Paying the spraint.

But first, a last look at the details I've added since the basic construction. A bent aerial base since the antenna will be tied off to the bumper, tarps and bedrolls are made from packing tissue paper soaked in diluted white glue, medical gauze for the camo net, the straps are from a foil wrapper with PE buckles from Aber and some fine beading wire and small chain from Micheal's craft store for the winch.


One of my most favorite times in a build is breaking out the airbrush. There isn't any cut fingers, lost parts to the carpet monster, mold lines to remove etc. It is also the place where you can express yourself however you want, some choose factory fresh, others choose just this side of destroyed, to modulate or not to modulate, accuracy or artistry. Whatever you do is your choice, we all have our own personal preferences and that's where the individualism really shines through, the finishes we choose. Without these choices, everyone would be building the same exact kit and where's the fun in that?

After spraying a primer coat of flat black and letting it sit for a few days, I have begun applying the various shades of olive drab. For this build I am using LIFECOLOR paints and I truly love their Allied green set for OD choices. I like the way they go on, both for brush painting and as you will see here, through the airbrush.

I lay on a base color with the darkest shade and work my way up to a lighter shade leaving some of the black primer coat visible in recessed panel lines and on outer edges, I believe this technique is referred to as pre-shading. It wont be as pronounced on the finished product but for it to have any effect in the end, it should be rather obvious at this stage.


Next will be the detail painting of the separate stowage items and tools, some oil paint weathering and then pigments. Of course, I'll have to mout those tracks, tires and running gear first!

Thanks for watching.

Monday, July 27, 2009

M4A1 mortar carrier part 1

Ruining a perfectly good kit.

The mortar carrier I chose to build this time around, (I have three more in the stash) is a 3rd AD version. Ask anyone who's seen an M4A1 mortar carrier with the mortar facing forward and they'll probably tell you about the 2nd AD and their 'funnies'. While the 2nd AD definitely has the spotlight, the 3rd AD certainly gets my vote for the better design.

If you are familiar with the crew compartment layout of the M2, you'll know the fuel tanks were at the rear and the stowage boxes in the front, the M4 was based on the M2, being the only true 'variant' in the whole half track series. The improved mortar carrier M4A1 raised the mortar on a pedestal and had a base for the bi-pod to allow for traversing. The 3rd AD weren't satisfied, and went to work on their M4A1's.

By removing the side armor, from the entire crew compartment, swapping the fuel tanks to the front and the stowage boxes to the rear they could leave the elevated pedestal in it's place and have the bi-pod to fall directly behind the cab. Placing the left side armor on the right and the right side on the left, they had the access doors to the rear of the vehicle to match up to the now moved stowage boxes.

This is an interior shot of a 3rd AD mortar carrier during training prior to D-Day, it should be apparent with some careful study, that something is out of the ordinary.


Now the biggest problem with this plan is that the sides of the fuel tank are molded to the side armor and the fuel tank armor is molded to the floor. After some careful surgery and re-attachment, followed by some scratch building of the rear exterior stowage boxes and a brass traverse plate, the crew compartment looked like this.


The mortar carrier was from what I can gather up to now, was built by only one manufacturer, the White Motor Company. Many of the other half track models were built by two and sometimes all three manufacturers, Diamond T and Autocar. The manufacturer responsible for mainly lend lease vehicles, International Harvester not included of course.

White seemed to have two styles of skate rails and most of the mortar carrier pictures I've seen show the later style. The early style was a solid one piece welded gusset design, while the later style was more flimsy and made up of thin bolted brackets. Perhaps to save on raw materials, perhaps to cut down on wieght. Whatever the case, I tried to emulate this style the best I could, hopefully my future attempts will improve.


For the last bit of this entries photos I decided to add the de-mountable headlight brackets scratch built from brass and using resin headlights, The radio shelf and radio, the .30 cal MG and a resin rear tarp made by Blast IIRC. My next entry will be the last few details and then paint!

Thanks for following along.


Sunday, July 26, 2009

Where to start?

This has been something I have wanted to do for some time and I have decided to finally make a start. I have been posting my work on various websites over the last ten years or so under a few different monikers. Some may know me as Camokid but my blood runs lusterless, olive drab.

My main interest lies in the Allied half track, a vehicle that is and always has been very much overlooked and under appreciated. It is often viewed as a simple and easy vehicle to understand when compared to some of the more popular Axis vehicles and I am hellbent on changing that.

For my first entry here I will be modeling the mortar carrier. There are at least five possible layouts that can be considered when building this vehicle alone but unfortunately, much of this information goes unnoticed. Over time I hope to cover all five in depth as well as all of the other well known and not so well known vehicles.

The current state of this build is nearly completed but I will start from the beginning of the process for the purpose of this first blog entry. For now, a teaser photo of the current state just to keep your interest.

Watch this space!